Yoga was introduced to the West in the late 1800’s and gained popularity in the 1960’s. However, yoga’s mainstream acceptance only came about in the 1990s. Despite the fact that you can find yoga in almost every American home, park, and gym, there are still some people who are reluctant to do it. We thought it would be useful to share some basic yoga poses that are easy to learn and can help you to become one with your mat, which will allow you to reap the many benefits of a yoga practice.
A Little Pep Talk, first
Yoga is for everyone. Let’s talk about what is keeping you from yoga. Are you shy about how you would stand out among a group of devotees. Are you afraid your friends will laugh at you? You think you only need one Sanskrit tattoo It’s not true! You may not be as familiar with yoga as you think. Have you ever worked your core doing plank poses at the gym? Plank pose is a type of yoga, so you should already be familiar with it. You can now bump your fist!
Even if you have never attempted plank pose or any other yoga pose before, yoga is all about concentration (and a bit of flexibility). Everyone in yoga class will be too busy focusing on their yoga practice to think about yours, even your friends. While there may be many students doing body art on the mat, it is part of a wider group of yogis. Yoga philosophy is another important part. It includes non-judgment. Yoga sequences offer a safe space to explore your body, and help you develop mind and body awareness. Learning how to make a fitness program your own is often the most important part of it. Yoga can be an excellent addition to your personal workout routine. Most often, we hear, “I am not flexible” or “I will feel out of place” and “I don’t know how to do yoga.” It’s easy to admit that we aren’t good at many things, especially when we’re just starting. It’s good to keep trying. Yoga is a practice with many benefits. Put on your comfortable clothes and get ready to learn basic yoga moves.
Let’s first take a moment and breathe.
Yoga for articles often jump straight into easy yoga poses or beginner yoga poses. They miss the most important aspect of yoga, the breath. Let’s start by introducing you to the life force behind all yoga poses and the part that has the greatest benefits for your entire body: breathing. Good posture includes a straight spine, shoulders back and head looking straight ahead. You can either sit on the ground, kneel or lay on your back – whatever is most comfortable. Deeply inhale through your nose and fill your lungs with air. This will allow you to reach your rib cage, chest area, shoulders, belly, and back. Inhale through the nose. Your belly will contract and your rib cage will knit together. You might place your right hand above your heart, and your left over your stomach. Then take a deep inhale and let it out slowly. For a few moments, you can stay here. This is called ujjayi pranayama.
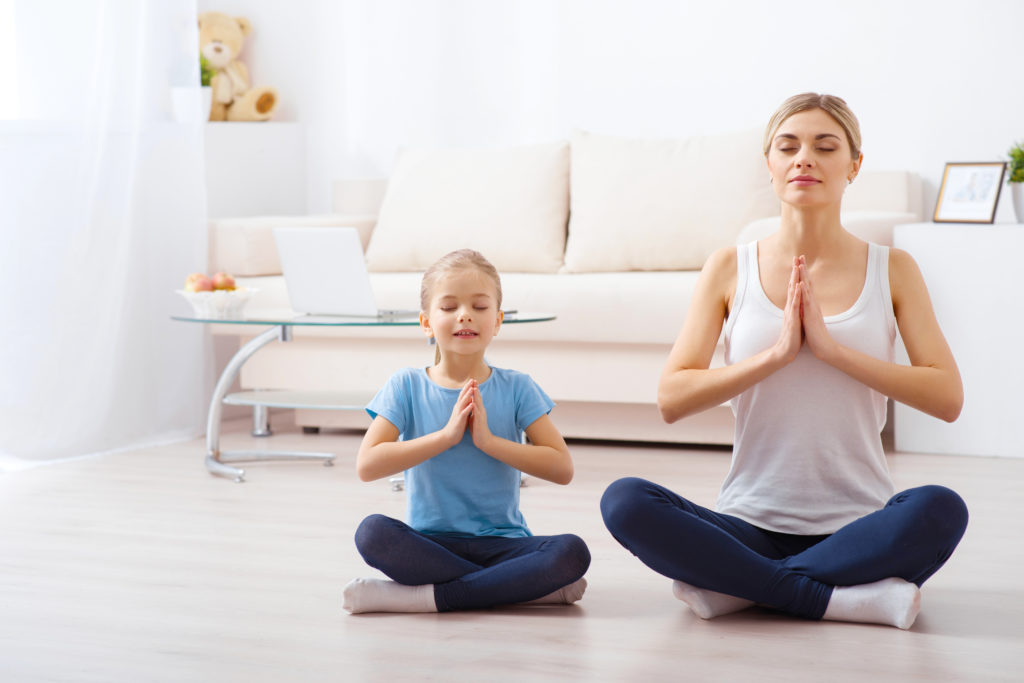
Easy Pose (Suk asana).
This pose is a great place to start if you are new to yoga. But don’t let its name fool you. You’ll be amazed at how much hip flexibility and back strength you need to stay upright for even a few minutes if you aren’t used to sitting straight up with your legs crossed. To help tighten your hips and leg muscles, you can try sitting on a blanket, block or pillow. Cross your legs and place your pinky toes and feet on the ground. Your shoulders should be rolled back. This will allow you to stretch your spine and extend your torso. Place one arm in front of the other and bring your palms together, so your elbows point towards the ground. This is called “heart center.” After you have found a comfortable position, pay attention to the rhythm of your breathing, and control how much you breathe in and out.
The Child’s Pose
This is one of the most basic yoga poses. Place your feet on a tabletop, with your hands and knees bent. Next, bring your big toes and big toes together and let your knees reach the edges of your yoga mat. Your hips should be pointing backwards and down on your heels. Your spine should be extended and your arms extended out in front. Press your fingertips and palms into the ground. Now, you will be in a forward bent position with your upper body over your lower body, your knees close to your armpits and your glutes on your heels. Your forehead should be connected to the mat, with your arms extended. Alternatively, each arm can rest along one side of your body. You may close your eyes. You can close your eyes if you are experiencing low back pain. This is your “homebase” pose. Your yoga instructor will often invite you to return to this position whenever you need a break. This is a wonderful place to reset and reconnect with your breath, especially for beginners. This is one of the most relaxing and beneficial resting positions you can do. It offers gentle stretching for your lower back, hips and thighs, as well as your knees.
Dog that is downward facing
This is the “V” pose, which you see often. Place your hands on a tabletop, with your knees at shoulder width and your feet at hip distance. Toes should be tucked under. Hips should be lifted high, and heels should touch the ground. Now, you will be in a forward bent position with your hands and feet touching each other. Soften your knees. Relax your neck and head by reaching your chest towards your thighs. Your shoulders should be pulled away from your ears. Your spine should feel long. Exhale and lift your hips, then exhale, bringing your heels towards the floor. Reach low. If you like, alternate bending your left and your right knees and pedaling out your feet a few more times. Breathe in through your nose. You should evenly distribute your body weight from your feet to the tips of your fingers so your wrists don’t get stressed. This will stretch your legs, hands, arches, and hamstrings. You can even relax with it. To help you keep your legs straight, place a yoga block underneath each hand.
Cobra
This is an easy way to do yoga poses. Place your hands on your stomach and raise your chin. With your elbows pointed straight up towards the sky, place your hands below your shoulders on the mat. Your legs and inner thighs should be zipped together. As you press into your feet, engage your abs and pull your chest and chin from the mat. Your hands should not be holding any weight. To help you lift, think about reaching forward and reaching your chest. Lift only as much as you feel comfortable. This will stretch and strengthen your lower back, as well as firm your glutes. Cobra can be used as an alternative to the Upward Facing Dog position, which helps you build strength. Ask your instructor about this alternative and don’t be afraid to ask.
Warrior 2
This is one our two standing poses. While it’s not an advanced pose, there are many benefits to it. Standing on the top edge of your yoga mat, stand. Stand with your left foot on the yoga mat in a lunge position. Keep your right foot pointed forward and your right leg over your right ankle. Your left heel should be pointing down, with your toes pointing diagonally. Your right hip should be pointing to the left. Open your pelvis to the sides. Your left arch should be in line with your right heel. Your arms should be straight at your shoulders. Look over your right arm. Breathe. When you are ready, return to the top of the mat. Repeat the process on the opposite side. Warrior 2, the most popular of all warrior poses, is the basis of many yoga routines. This pose will open your chest, lungs and groin area.
Bonus: Tree Pose
Tree pose is the final standing pose. It is a progression of mountain pose. This is a good starting balance pose, but not an easy one! This provides a good foundation for other balance poses. Mountain pose: This is the most common yoga position. You stand with your feet on the ground, your arms straight above your head and your legs are directly below your shoulders. In a prayer pose, bring your palms together and face each other. Stand tall by firmly rooting your right foot into ground. Your left knee should be bent forward. Then, extend your left leg outward. Your left thigh should reach towards the ceiling. Your left foot should reach toward the ceiling. Your foot shouldn’t press into your knee joint. Your sole should be above or below the knee. To stand taller, use the force of your inner leg and your sole to press together. Root through your standing leg. It should feel like someone is pulling a string through your right foot, your thigh and up to the top of the top of the head. If you want to center your energy, you could place your right hand above your heart, and your left over it. Or you can move in reverse namaskar, with your hands behind your shoulders, and your hands in prayer. Remember to breathe when you are trying to balance. Even if you fall to the ground. Tree Pose can improve balance and strengthen your legs.
There are many other beginner poses that we could cover, such as cow pose which can be used in any warmup, pagan gust asana which allows you to extend your right or left leg straight out in front of your body while your opposite foot is on the ground, padangusthasana which requires you to lie down on your back, chilling at the end of class and full yoga exercises to strengthen your upper, lower, and entire bodies. These are great places to start because they provide the foundation for many more poses and sequences. It can sometimes be difficult to hold yoga poses for the time that your instructor has given you. This applies to both beginners and experts. Keep your breath steady and don’t let your heart rate drop. If you feel like you are slipping, go back to the beginning.